Examples of Decoding Words
Are you having difficulty finding an activity or examples of decoding words for phonics lessons? Do you need more phonics-based practice that is a highly effective way to practice and improve your students' decoding and blending skills? What is orthographic mapping, and how can I use it to help my students read more fluently? If you have these questions, let me share my experience and examples of decoding words using interactive word lists + orthographic mapping with real and nonsense words. It has been life-changing and has helped my students' reading fluency increase! Read on to find out how I use these decoding examples in reading during my phonics-based guided reading lessons. You will also find a FREE exclusive example of word mapping and word mapping tools and templates.
Examples of Decoding Words
What are Phonics Word Lists
Phonics-based word lists are a list of real & nonsense dynamic words that are targeted to the specific phonics skill being taught. For example, my Phonics Word Lists + Orthographic Mapping for Consonant Digraphs - DIGITAL/EDITABLE has real & nonsense beginning and ending consonant digraph words sorted by their phoneme. Consonant digraphs are two consonants that work together to make one sound or phoneme. (i.e. sh- , wh-, th- ch-, -sh, -th, -ch, -ng, and -ck) These digital word lists were created for phonics instruction during a guided reading lesson plan or word recognition lesson plan. The word lists are systematic and sequential. They start with the phonics skill your students need to work on and will continue to review previously taught phonemes throughout each list. This means that the consonant digraphs will not have silent e, r-controlled vowels, vowel teams, etc. The word lists, however, will review previously taught sounds (i.e., short vowels and double consonants). This digital resource is EDITABLE!
Word Lists Progression
Why Do We Use Word Lists for Decoding?
In my previous blog, 7 Fun Activities for Phonics Based Word Lists & Decoding of Words, I talk about the importance of word lists, why we need to practice them, and activities to do with your phonics lessons. Understanding letters (graphemes) and sounds (phonemes) and their connection will help your students recognize familiar words quickly and figure out words they haven't seen before. Here are 3 main reasons why we need to use phonics word lists with real & nonsense words in our phonics-based guided reading lessons.
♦ Decoding of Words - Decoding words is the ability to break a written word down by its letter-sound relationship. For example, if you have the word ship you will break the sounds of the word like this /sh/, /i/, /p/.
♦ Blending Words - After students decode a word, they will fluently join together the individual sounds (phonemes). Like our example above. Your students will decode the word ship (/sh/, /i/, /p/). Then, they slowly blend those phonemes together (“shhhiiippp”). They will then read the word (“ship”).
♦ Fluency - The ability to read with speed, accuracy, and proper expression. Not only do we want our students to read more automatically, but we also want them to be correct when reading. Practicing these phonics-based word lists consistently and with repetition will help with this. Again read the article 7 Fun Activities for Phonics Based Word Lists & Decoding of Words to see how I incorporate this into my phonics teaching method.
Examples of Decoding Using these No Prep Digital Phonics Word Lists in my Classroom!
Here are a few examples of decoding words I use in my classroom. I want my students to be exposed to a variety of different words that are phoneme specific. I like to provide ample opportunities to add more excitement and suspense to their reading. During the decoding component of my phonics lessons, there will be a digital interactive word list for each new phoneme. All words will start hidden. Teachers or students will click to reveal one word at a time. Have students identify if the word is real or a nonsense word. If it is a real word, have them share the meaning. Challenge: If it is a nonsense word, see if the word reminds students of a real word. You will do this for all 20 real & nonsense words. Here is an example of decoding while introducing and reviewing these digital phonics word lists. All these ideas can be done during the whole or small group reading!
♦ Introduce New Phoneme - After the phonological and phonemic awareness component of my phonics-based guided reading lessons, I will introduce the new phonics skill we are working on for the day. I will talk about the sound(s) it makes and what sound(s) I hear. It is essential to talk about your tongue and mouth's position. With enough mirrors, it is always best practice for students to look at themselves as they say the sound(s). For example, if we are working on the sh- phoneme, I will say the sound /sh/ and have the students repeat it. I would tell children /sh/ is the sound they make when they want someone to be quiet. Then I would point out that when I say /sh/, my lips form a tight circle, my mouth is only slightly open, the sides of my tongue are between my teeth, and the air is forced out through my front teeth. Then I would put the digital word lists for /sh/ on my smartboard and have students get out of their mirrors and watch themselves say words that begin with /sh/. You can also do this for middle and ending sounds. This is one of many examples of decoding words I use in my classroom.
♦ Review Previously Taught Phonics Skill - Again, after the phonological and phonemic awareness component of my phonics-based guided reading lessons, I will review the previous day's phoneme. I will quickly review all 20 words and use them as examples for decoding words. I will pull up the digital interactive word lists on my smartboard or computer and make a game. Timing students is always fun and engaging for them. My students like to play the game “Beat the Clock.” I partner students up so one person is the timekeeper and the other is the reader. Then they will time how long it takes for them to read the list fluently. They will record their time and switch jobs. They will do this twice to see if they can beat their first read’s time. When you review previously taught phonics skills, this will allow more practice when decoding in reading.
What is Orthographic Mapping
I will discuss Orthographic Mapping (word mapping) more in my next post, but I wanted to share the basics with you. Word mapping is the process of looking at a word, reading the word, breaking down the words into sounds, writing the letter combinations of each phoneme, and writing the entire word. This resource will allow students to build their word recognition skills to connect speech phonemes to the graphemes permanently. The Science of Reading tells us that Phoneme-Grapheme Mapping is the most effective way to help students build their word recognition and become stronger readers. You can use these slides in distance learning settings and in-person, reading whole groups, small groups, or independent review.
Are you looking for more information on Phoneme-Grapheme Mapping? Check out the book Phonics and Spelling Through Phoneme-Grapheme Mapping, Written by Kathryn E. S. Grace. “This book is a critically acclaimed work that contains sequential, systematic, and explicit lessons which help students understand the reality that the number of sounds (phonemes) they hear in a word may be different from the number of letters that represent those sounds.”
How to Use these Ready-Made Digital Activities for decoding!
These procedures help students practice and understand the phonemic and graphing skills that make up each word. Here is an example of using word mapping with the digital orthographic mapping slides.
After reading the interactive word list, the slides will go through the encoding in the reading section of the lesson plans. Your students will orthographically map each word individually. One word will appear on each slide. There is an example of word mapping and steps below!
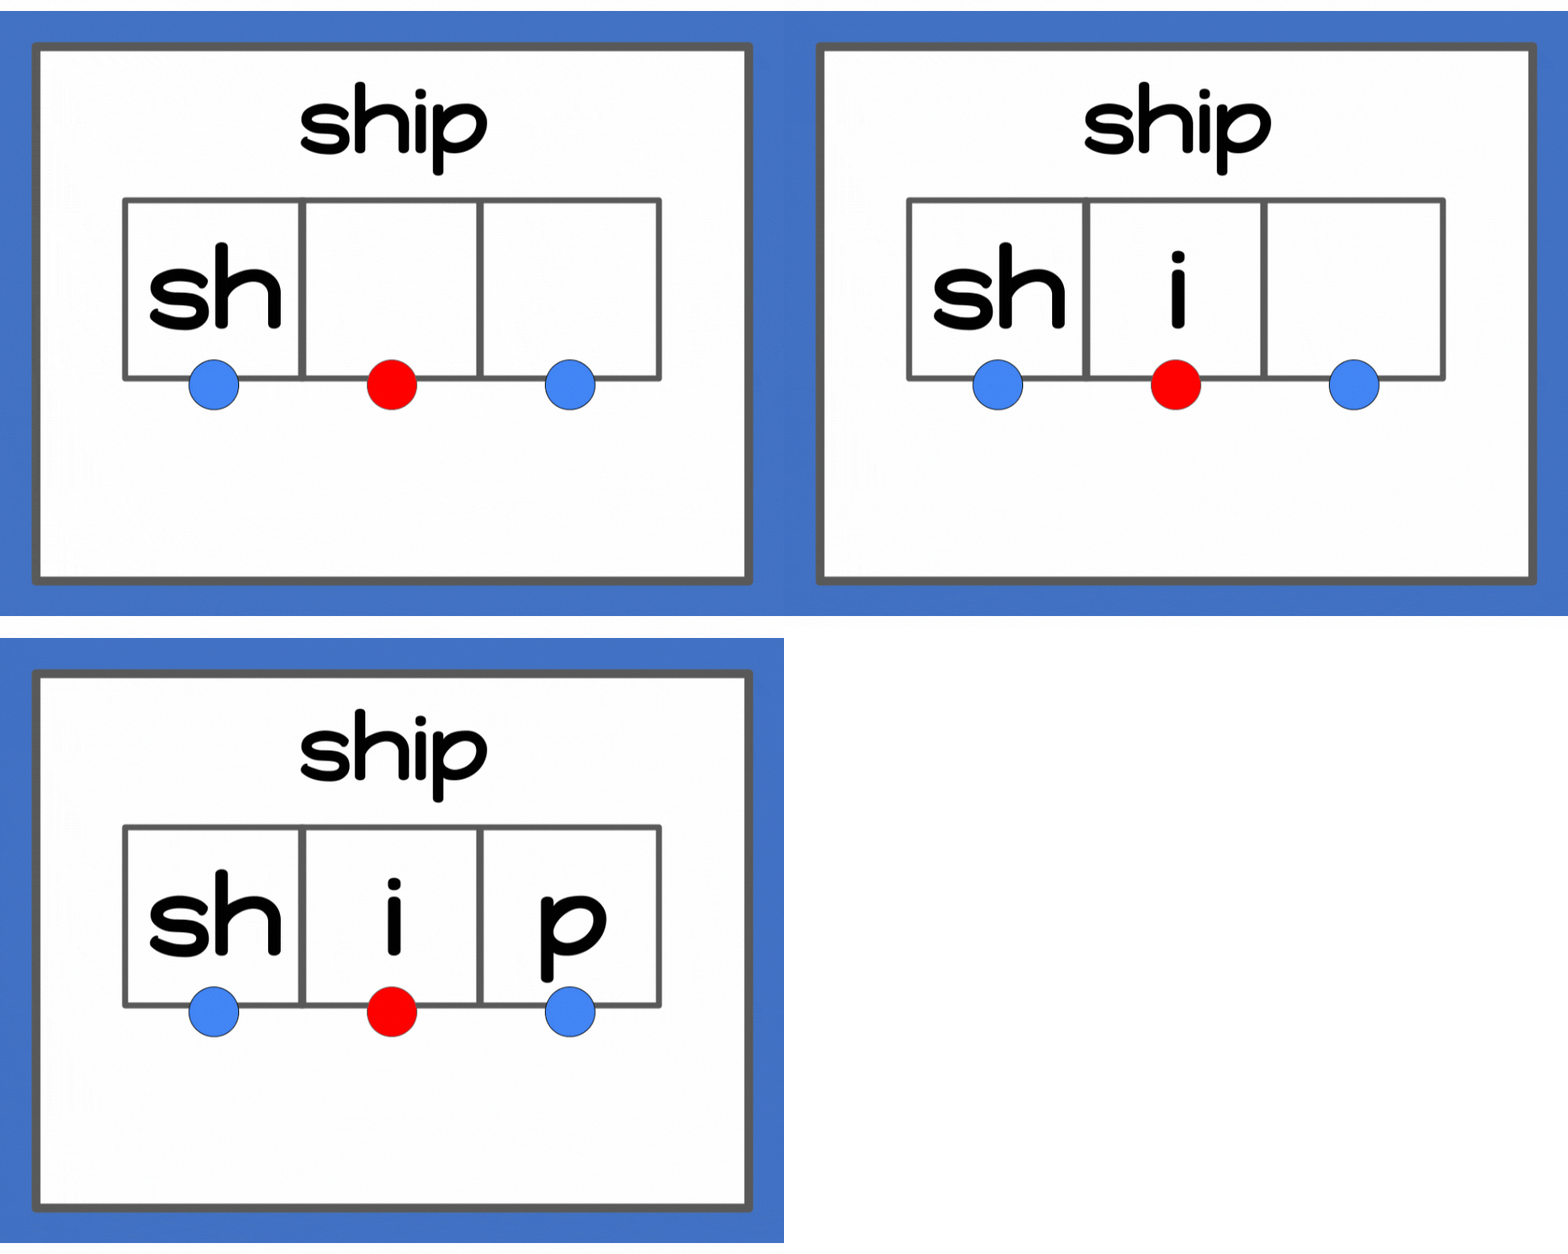
Identify the Word: Start with looking at and reading the word. (example: ship)
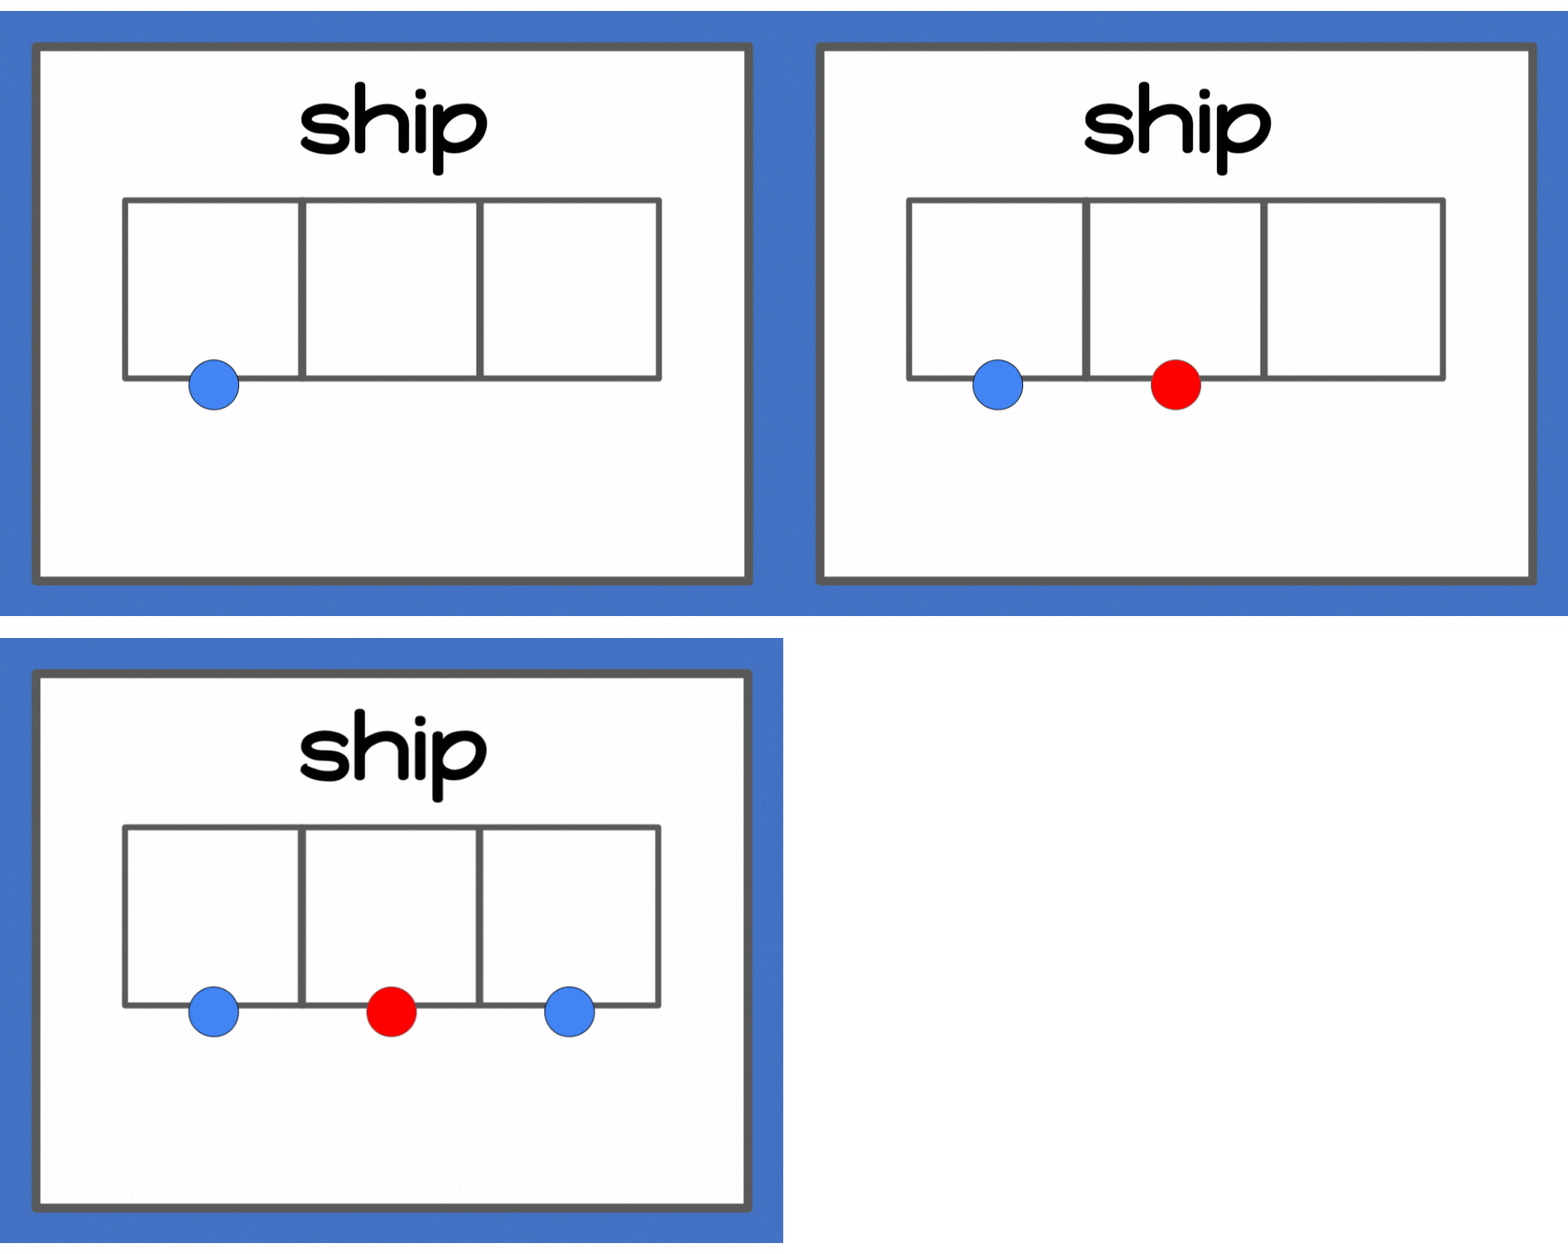
Tap the Sounds: Have the students begin to segment or decode the word into sounds. I always have students tap out the sounds with their fingers first before they start clicking. (For example, the thumb would be the /sh/ sound, the pointer finger would be the /i/, and the middle finger would be the /p/ sound).
Map the Word: After you click, the sound boxes will appear. Click again for the sound chips to occur automatically. Make sure you have the students say the sound as the sound chips appear. There will be one sound chip for each sound or phoneme they hear. Each click will produce a sound chip. Blue sound chips are for consonants, red are for vowels.
Graph the Word: Next, students/teachers will continue to click through the slide, matching the letter or letter pairs to the sound in the given the word. Continue having your students say the phoneme(s) as the grapheme(s) appear.
Read the Word: Finally, students will use the arrow to read the whole word.
Hands-on Phoneme-Grapheme Mapping- For students who are more tactile and need to move and manipulate the sounds, I love the idea of using the Moveable Alphabet to map out these digital phonics word lists orthographically. This hands-on approach is a great way to help sounds and graphemes “stick” in a child’s memory. For more details, visit the post The Design and Purpose of the Montessori Moveable Alphabet by Joy of Montessori.
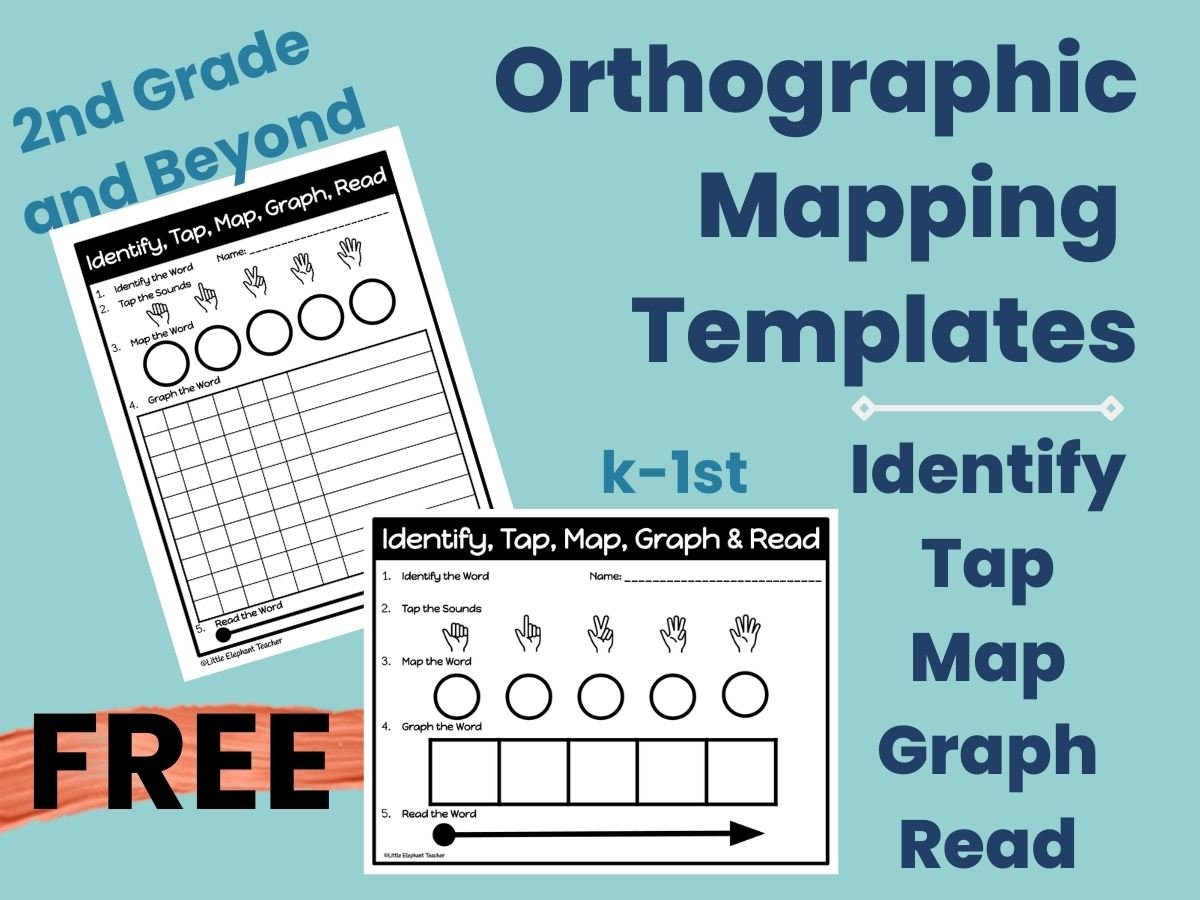
Extension- Use the following FREE word mapping tools through these slides. You can find this below. This orthographic mapping template is just the resource you need when mapping your words. I have my students write the phonemes & graphemes as I go through the digital word mapping slides. Students can Identify, Tap, Map, Graph, Read and Write at their desks!
Subscribe
to my email list below to get these FREE Word Mapping Tools
Read with Phonics Based Games
I mentioned earlier I like to play Beat the Clock with these digital phonics resources. The other game my students can't get enough of is Around the World. This quick-paced, nail-biter of a phonics game is easy to play and works well with any size group. The goal is for students to go around the room and return to their seats first. The player who does so wins the game.
How to play Around the Word using the Interactive Word Lists and Orthographic Mapping Slides
Step #1:
♦ Interactive Word Lists - you will show one word at a time.
♦ Phoneme-grapheme slides - have each student map out the word on their word mapping tool.
Step #2
♦ Digital Phonics Word Lists - the student who reads the word correctly first gets to move to the next student.
♦ Orthographic Mapping - the student who can Identify, Tap, Map, Graph, Read, and Write the correct word gets to move on.
Step #3
♦ The student who does not get the correct first is out. They will sit down in their chair and wait for their next turn!
Step #4
♦ If students answer five consecutive questions, they sit down, and play begins with two new challenges.
♦ Play continues until one student makes it back to their original seat. That student is the winner of the game.
I absolutely enjoyed sharing my ideas for how I am using these digital word lists & word mapping tools during my phonics-based guided reading lessons! I’d love for you to email me or DM me on Facebook and Instagram with what you need more help on. I’m here to help you with any phonics and reading lesson planning questions you may have! I hope that after reading this article, you will find these examples of decoding words helpful and that you will make phonics word lists and orthographic mapping a staple in your reading classroom. You can find these Digital Phonics Word List + Orthographic Mapping activities at my Teachers Pay Teachers Store or click on the link below!
Looking for specific phonics skills? You can find them at the links below.
If you have any questions, please feel free to email me at Littlelephanteacher@gmail.com
I appreciate YOU!!
Be the first to know about my new discounts, freebies and product launches:
CLICK HERE to receive updates on new products, sales, and freebies! I discount ALL new products up to 50% off for the first 24 hours. It really does pay to follow me!
⭐️ Customer Tip:
Don’t forget that leaving feedback earns you points towards FREE TPT purchases.
I truly do value your feedback!
⭐️ What are TpT Credits?
You can gain TpT credits by going back and leaving feedback on any purchases that you have made. The credits build up and then you can use them towards future purchases! The credits REALLY do add up!


